Version Control
Version control tracks changes to files over time, so you can review changes, undo mistakes, and let multiple people work on the same project without overwriting one another. Git is a widely used version-control tool. This tutorial explains how to install and configure Git and how to use a Git hosting platform such as GitHub.
Installation
- Windows
- macOS
- Linux
Download Git from the official Git for Windows page.
Open the installer, keep the default settings unless your team instructs you otherwise, and wait for the installation to finish.
Choose one of these options:
Homebrew
Install Homebrew if you do not already have it, then run:
brew install git
MacPorts
Install MacPorts if you don't already have it, then:
sudo port install git
Xcode Command Line Tools
Apple ships a binary package of Git with Xcode Command Line Tools. You can install this via:
xcode-select --install
Debian/Ubuntu
To install the stable version provided by your Debian or Ubuntu release:
sudo apt-get install git
On Ubuntu, this PPA provides a newer stable upstream Git version:
sudo add-apt-repository ppa:git-core/ppa
sudo apt update
sudo apt install git
Fedora
sudo yum install git (up to Fedora 21)
sudo dnf install git (Fedora 22 and later)
Gentoo
sudo emerge --ask --verbose dev-vcs/git
Arch Linux
sudo pacman -S git
openSUSE
sudo zypper install git
Mageia
sudo urpmi git
Nix/NixOS
nix-env -i git
FreeBSD
sudo pkg install git
Solaris 9/10/11 (OpenCSW)
sudo pkgutil -i git
Solaris 11 Express, OpenIndiana
sudo pkg install developer/versioning/git
OpenBSD
doas pkg_add git
Alpine
sudo apk add git
Red Hat Enterprise Linux, Oracle Linux, CentOS, Scientific Linux, et al.
RHEL and related distributions may provide older versions of Git. You can download a source archive or use a trusted third-party repository to obtain a newer version.
Slitaz
sudo tazpkg get-install git
Configuring
- Open a terminal in VS Code.
- Set a Git username:
git config --global user.name "FIRST_NAME LAST_NAME"
- Confirm that you have set the Git username correctly:
$ git config --global user.name
> FIRST_NAME LAST_NAME
- Set a commit email:
git config --global user.email "YOUR_EMAIL"
- Confirm that you have set the email address correctly in Git:
$ git config --global user.email
email@example.com
Making a GitHub Account
GitHub is a website where developers can store and share projects that use Git. It allows multiple people to work on the same codebase, review one another's changes, track problems, and keep an online copy of their work. Git runs on your computer, while GitHub hosts Git repositories online.
Official GitHub Page
Click Sign up for GitHub to create an account. Use a personal email address that you will continue to have access to after graduation. You can add additional email addresses to the account later.
Then ask a programming mentor to add you to the Simbotics organization. After accepting the invitation, you will be able to access the team's repositories.
Authenticating with GitHub from Git
-
In VS Code, click the Accounts icon in the bottom-left corner and select
Sign in to sync settings->Sign in. -
Select Sign in with GitHub and approve the request in your browser.
-
Create a folder for testing Git.
-
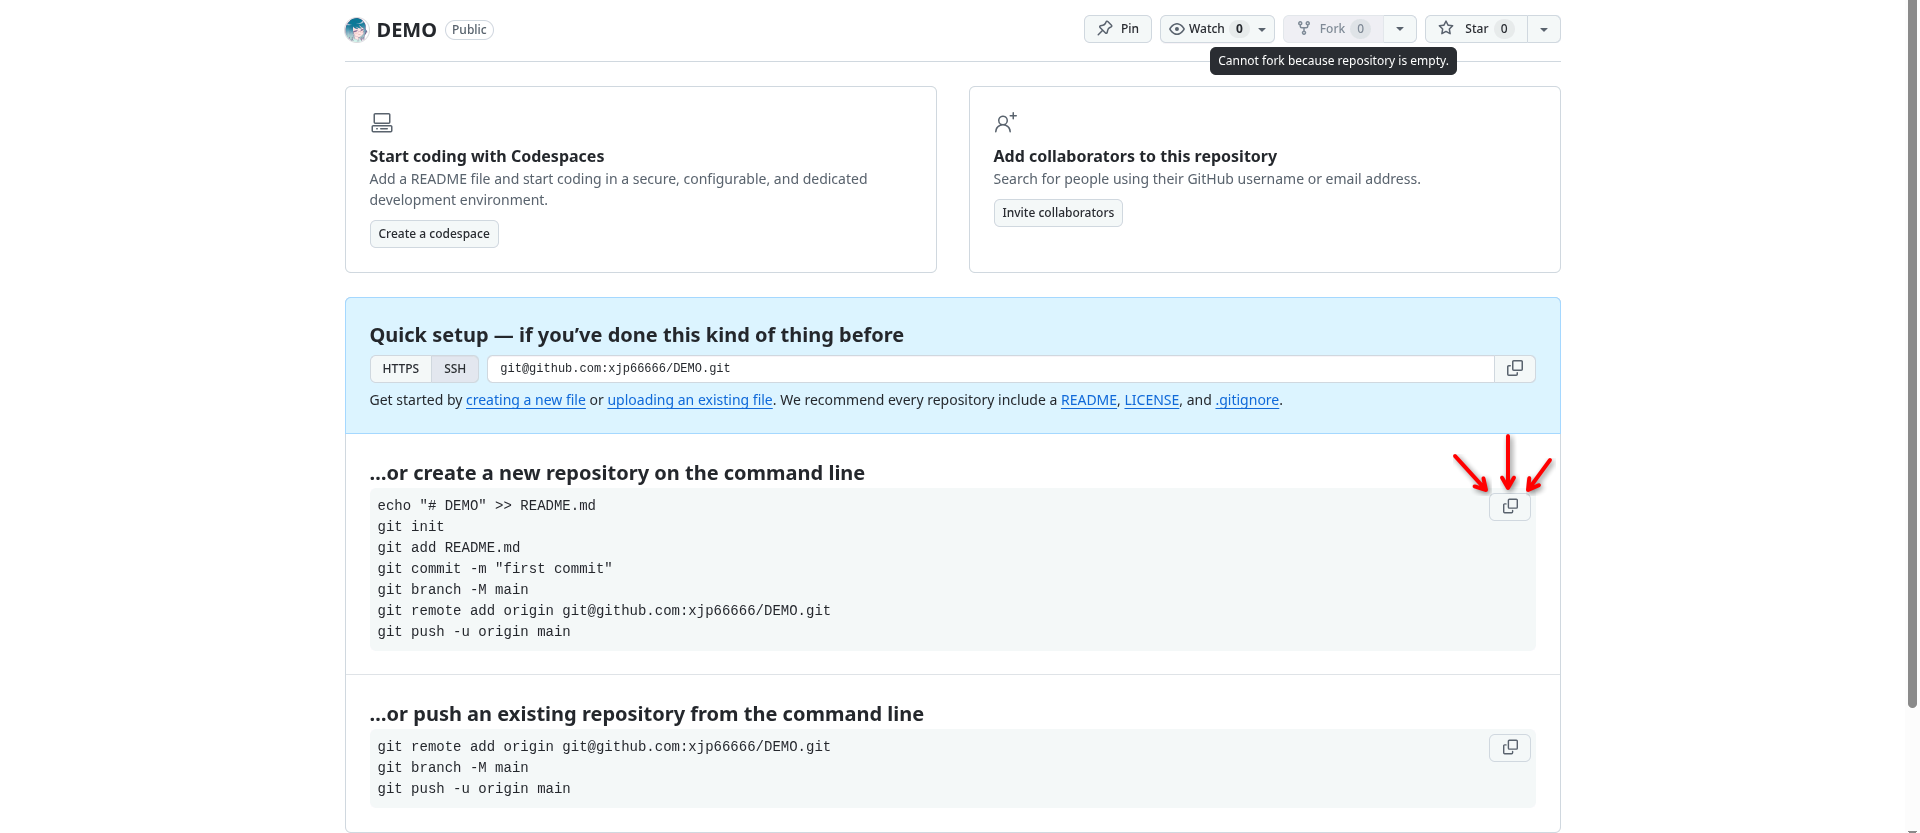
Create a new repository on GitHub. Leave the options for adding a README,
.gitignore, and license unchecked so the repository starts empty. -
Give the repository a name, then click Create repository.
-
Copy the commands under …or create a new repository on the command line:
-
Return to VS Code and open the folder you created. Open a terminal, paste the copied commands, and press
Enter. -
Logging to GitHub through Git.
-
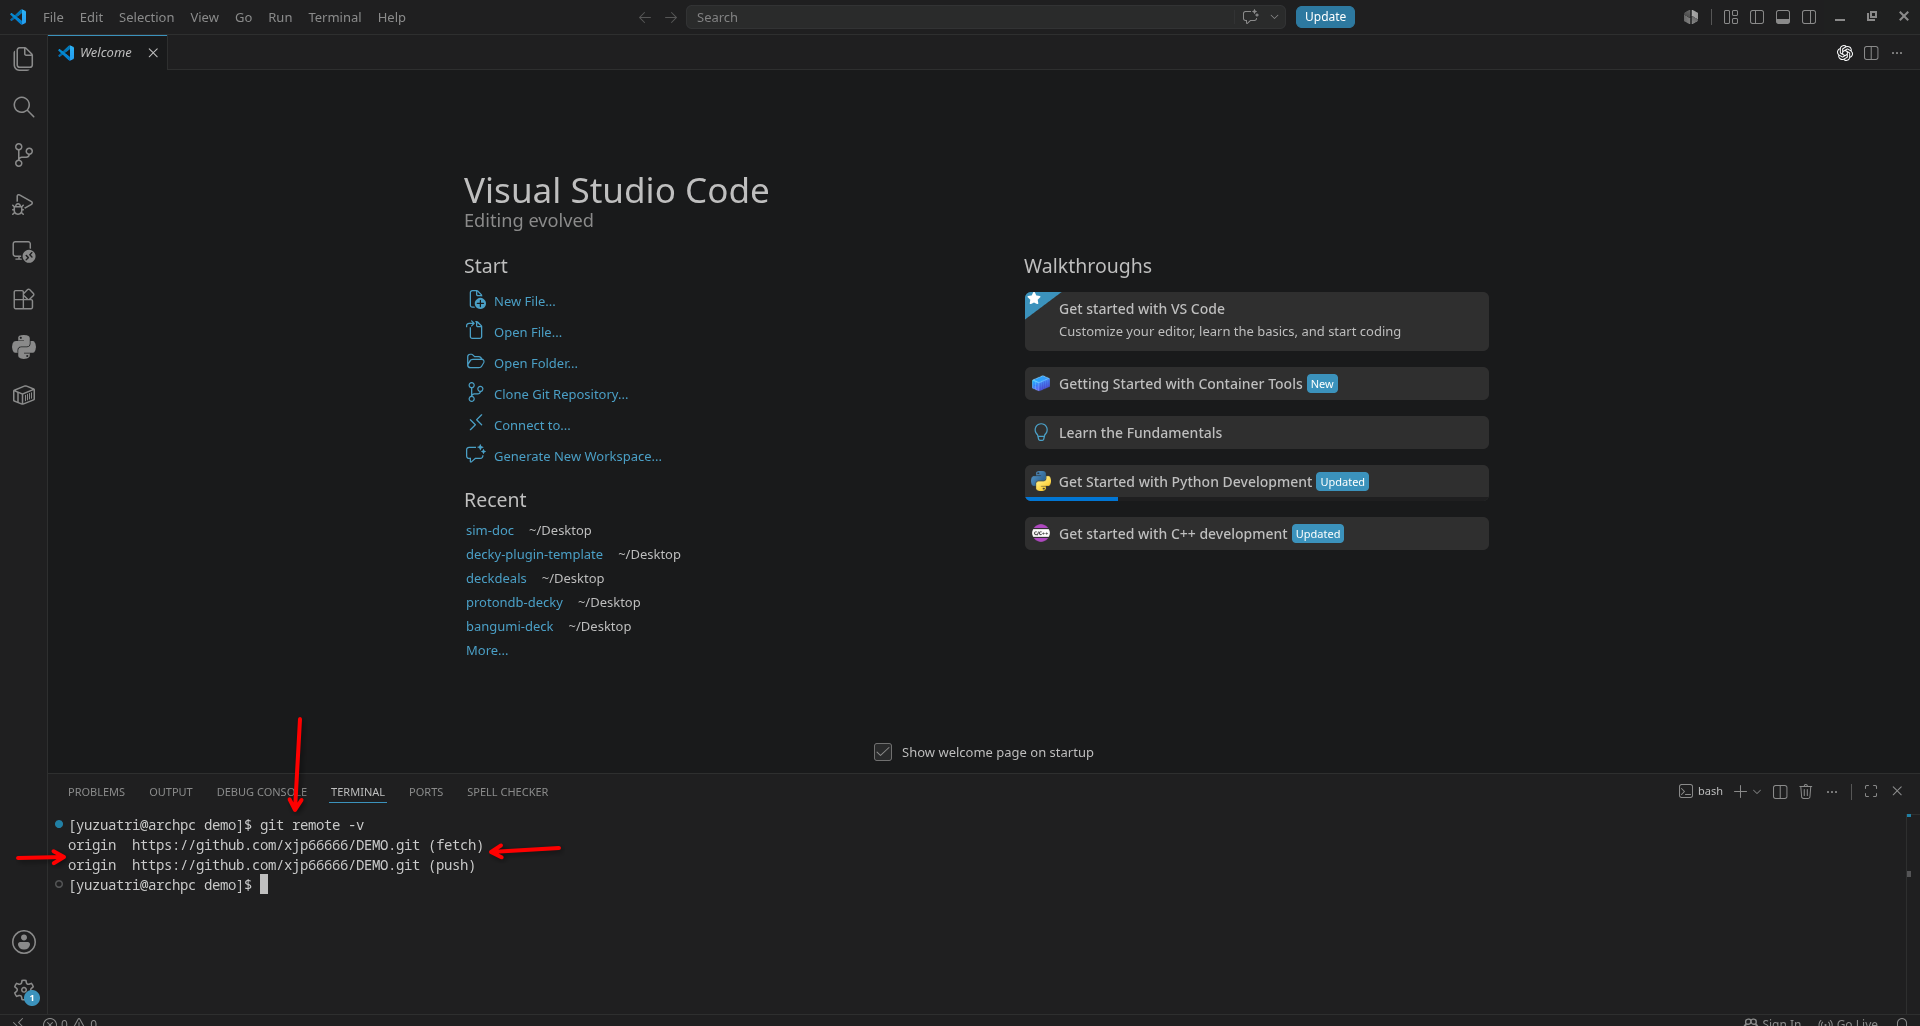
Run the command below to check whether Git is connected to the repository:
git remote -v
You should see output similar to this:
Trying Version Control
Now we will use the DEMO repository you just created to see how Git saves changes and separates work into branches.
Making Your First Commit
In the VS Code Explorer, create a new file named demo.txt. Add this line to the file and save it:
This file is on the main branch.
Open the terminal and run:
git add demo.txt
git commit -m "Add demo text file"
git push
git add selects the file, git commit saves a checkpoint, and git push sends that checkpoint to GitHub.
Making the First Branch
A branch is a separate version of the repository. Create and switch to a branch named first-change:
git switch -c first-change
The branch name in the bottom-left corner of VS Code should change from main to first-change.
Change demo.txt to:
This file was changed on the first branch.
Save and commit the change:
git add demo.txt
git commit -m "Change text on first branch"
Switching Back to Main
Switch back to the main branch:
git switch main
Open demo.txt again. It should say:
This file is on the main branch.
Your change did not disappear. It is saved on first-change, while main still has the original file. Switch between them to compare:
git switch first-change
git switch main
Watch the text in demo.txt change when you switch branches.
Making a Second Branch
While on main, create another branch:
git switch -c second-change
Create a new file named second.txt and add:
This file only exists on the second branch.
Save and commit it:
git add second.txt
git commit -m "Add file on second branch"
You now have three different versions of the repository:
mainhas the originaldemo.txt.first-changehas the changeddemo.txt.second-changehas the originaldemo.txtand the newsecond.txt.
Use these commands to switch between them:
git switch main
git switch first-change
git switch second-change
Notice how the files change depending on which branch you are using. This allows different programmers to work on different changes without affecting each other.
Sending the Branches to GitHub
Push both new branches so they also appear on GitHub:
git switch first-change
git push -u origin first-change

git switch second-change
git push -u origin second-change
Open the repository on GitHub and use the branch dropdown to switch between main, first-change, and second-change.
Git Command Cheat Sheet
| Command | What it does |
|---|---|
git status | Shows your current branch and changed files. |
git add FILE_NAME | Selects a file for your next commit. |
git add . | Selects all changed files for your next commit. |
git commit -m "MESSAGE" | Saves a checkpoint with a short description. |
git push | Sends your commits to GitHub. |
git pull | Downloads the latest changes from GitHub. |
git branch | Lists all branches on your computer. |
git switch BRANCH_NAME | Switches to an existing branch. |
git switch -c BRANCH_NAME | Creates a new branch and switches to it. |
git remote -v | Shows which GitHub repository is connected. |
Replace FILE_NAME, MESSAGE, and BRANCH_NAME with your own information. For example:
git add demo.txt
git commit -m "Update demo file"
git switch first-change